Mastering the techniques of sourdough
By Anne Groebner
For over a year, I have been searching for my next loaf of sourdough bread. It all started when I met Kathleen Norton at a home decor shop, and she handed me a loaf she had just baked. That’s when I fell in love with it. Later, my friend Kim Young, owner of the Pinetop Olive Oil store, started baking some loaves, and I would show up at her shop every week. Unfortunately, she stopped baking it, and I had to venture out to find it somewhere else.
This summer, I worked a booth at the Artisan’s Market at the Depot Coffee House. Every week, there was someone selling sourdough bread. I was in sourdough heaven! Then, Kathleen Norton showed up at the market, and told me she could teach me how to make it myself — even better!
Kathleen Norton owns the Bread Shed in Pinetop-Lakeside. If you follow her on Facebook, you already know that you can order online and then pick it up at the shed. It’s also where she teaches the classes on making sourdough bread — the one that I signed
up for.
Sourdough is a living, self-sustaining ecosystem powered by a symbiotic relationship between wild yeasts and lactic acid bacteria. It is one of the oldest forms of leavened bread in human history — from as far back as the ancient Egyptians — sourdough has survived eons. Recently, there has been an upsurge in the desire for this crunchy, tangy, but healthier form of bread.
Sourdough is considered healthier because the fermentation process breaks down starches, complex carbohydrates and proteins (including gluten) making it much gentler on the stomach. It also has a lower glycemic index, offering a slower release of glucose into the bloodstream, preventing sharp blood sugar or insulin spikes. The lactic and acetic acid produced during fermentation naturally inhibit mold and bacterial growth, eliminating the need for artificial preservatives. It also acts as a source of prebiotics that feed beneficial gut bacteria, and the fermentation produces helpful organic acids and postbiotics.
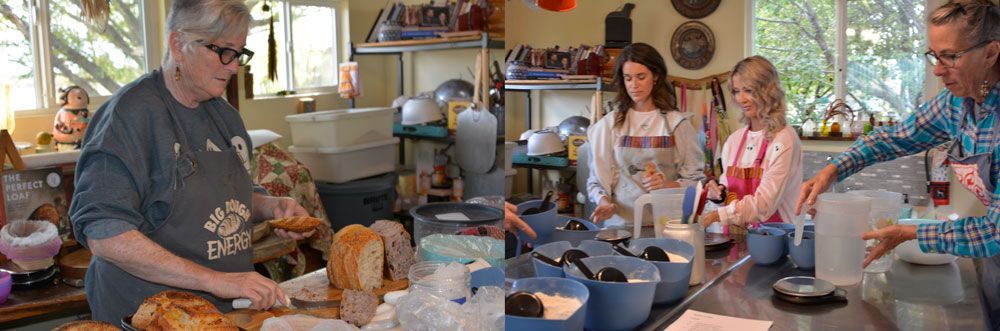
When I arrived at the Norton’s home, I walked back to the building with the sign above the door that read “Bread Shed.” I couldn’t miss it. It was the building with the many loaves of bread — walnut/cranberry, jalapeño/cheese, cinnamon and raisin, and plain — sitting on a metal shelf in front of it. Inside was a large stainless steel island covered with bowls of flour, salt, bread scales, spatulas, and a sheet of paper with the sourdough recipe on it. After a quick introduction of the five of us students, Kathleen started the class.
The best way to learn something is to do it, and that’s what we did. We measured the flour (bread flour and whole wheat flour) on our bread scales, then the water, salt and starter — which are the only ingredients in sourdough bread. Starter is a combination of water and flour that ferments on either the kitchen counter or in the refrigerator. If you bake a lot of bread, I’m told, then it doesn’t need to be refrigerated. However, if you don’t bake that often, refrigeration will slow down the fermentation process, and it’s easier to maintain.
After blending the ingredients, we stretched and folded the dough every half hour — four times and then left it in the bowl, covered with a shower cap. The class was only two hours, so we took it with us and stretched and folded at home. Then, I let it bulk rise in the same bowl, still covered, for about six hours. However, again I’m told you can leave it for up to eight hours. That night, I shaped it and put it in my banneton proofing basket, covered it with a light dish towel, stuck it in the fridge and went to bed. The next morning, I rounded it, scored it, put it in a dutch oven and covered it with a lid and then baked it for 25 minutes. Then, I took the lid off and baked it for another 25 minutes — until it was golden brown. It turned out perfect. Of course, this is a quick review of the steps to make sourdough bread. I suggest taking Kathleen’s class to get more details about the process.
I found that the starter is almost like a child. You have to feed it to keep it alive. The first week after the class, I was traveling, so I carried mine with me so that I could keep it fed. I also bought a new scale, a new pan with a lid, two banneton baskets, blades for scoring, some silicone slings to keep the bread from sticking to the pan, and a new bigger jar for my starter, which is growing. It sounds like a lot, but these bread-making tools were not that expensive because I opted for the sourdough bread kit. So far,
I have made two loaves, and I am starting my third.
When the class ended, Kathleen handed out slices of bread to taste-test and then gave each of us two loaves of bread of our choice. She also gave us a goodie bag with detailed instructions (in case we forgot something), a cotton towel and other goodies and a tote bag (that she made) to put everything in. I walked away with a lot of knowledge, much more than when I walked into that shed. It wasn’t as difficult as I thought it would be. In fact, it’s pretty easy. Now, my search for bread is over, and that’s a good thing.
Breaking Bread
Holidays are a great time to serve sourdough. Breaking bread with friends and family symbolizes fellowship, friendship, hospitality, and trust. In ancient times, people baked bread in large loaves and tore it apart by hand rather than slicing it with modern utensils, naturally sharing the loaf...and, the English word companion even derives from the Latin roots con- (“with”) and panis (“bread”), originally describing someone you share bread with. It’s our comfort food.
My wish for all of you reading this, is that you have a wonderful holiday season, break lots of bread and share it with others — and I wish you happiness and peace.