Beginner bike tips; from first ride to group rides

By Carol Godwin, Cycle Mania
Wahoo! It’s spring, and it’s time to get outside and bring back that summer shorts tan. Here in the White Mountains, mountain biking is one of the popular go-to’s for getting outside, but it can be a daunting sport to get into. Very often, people wanting to get into mountain biking or just new to the sport will come into the shop and want to know about it. They will say something like “We just want to get out and ride the trails, nothing crazy”. I say “crazy” is in the eye of the beholder and directly correlated to the amount of experience the rider has.
Crazy for me now is significantly above the crazy when I started and what was crazy for me at first is now easily handleable on trails, which most riders would consider an intermediate trail. I have no plans to move up to advanced crazy at 62 but I can rule nothing out…yes I can! No advanced crazy for me lol. How do you go from beginner crazy to intermediate or advanced crazy? Here are a few things I learned on my journey from wobbly fearful beginner to confident intermediate rider that will help guide you on your way with your new bike, assuming you took the plunge and got one. Wax or oil your chain, check your tire pressure and let’s begin this adventure!
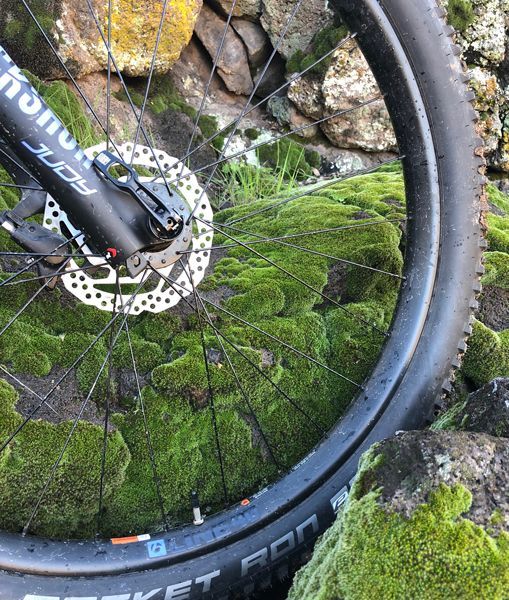
Bike fit: saddle height and width. First things first. Let’s get your new bike properly fitted to you. I’ll assume that you bought the appropriate size when you bought the bike, but not all bike shops will fit your saddle height to you. New riders often resist having the saddle at the ideal height because they feel intimidated by the fact that they cannot touch the ground while seated on the saddle.
Let’s think about this for a bit. When you pedal a bike, your legs should straighten out nearly fully, just a tiny bend at the knee. If you could put your foot on the ground from the seat, your pedal would also hit the ground from the seat. Not possible. A good start is to put the saddle height around the top of your hip joint. Have a loved one watch you pedal your bike away from them. Your leg should nearly straighten and your hips should not rock from side to side as you reach the bottom of the pedal stroke. If the seat is too high, your hips will rock as you reach for the pedals and this will put undue pressure on your sit bones…ouch! If the seat is too low, your knees will not straighten out and they will end up moving laterally on each pedal stroke. This will cause wear on your hip and knee joints over time and can initiate arthritis in those spots.
Adjust as necessary, and as you gain experience, your ligaments will actually stretch and you will find yourself slowly adjusting your saddle height higher over time, usually up to an additional half-inch in height. If you are still experiencing undue discomfort, you may need to replace your saddle with a wider or narrower one. Your bike shop can measure this and give suggestions on proper saddle fit. Women especially usually need a wider saddle than men do because of their wider pelvis and sit bone configuration. Padded Chamois shorts will also help tremendously, but make sure to raise your saddle height a bit to account for the added padding — it makes a difference! Incredibly, the shoes you wear also make a difference and a thicker sole can make your seat height too low to pedal as efficiently as you are used to.
Bars. Most bikes come with a standard bar length. Watch your hands and wrists as you ride. If your hands are angled in, your bars are probably too wide, and if your wrists are collapsing on the bars, you are probably too cramped in the cockpit. If you constantly feel you are reaching forward, your bike is probably too large and the cockpit too long. Your wrists should come to the bars at about the same angle that your arms are coming from your elbow and should be relatively straight on the bars. If you have narrow shoulders or shorter arms, you may need to get your bars cut down to fit you. This is simple to do and any bike shop can do this for you. You want to be holding the bars at a distance that is natural for you.
Hold your arms out with the palms down in a position that feels comfortable, elbows bent. Holding a broomstick might help you feel more natural. Measure the distance from outer edge to outer edge of your hands or place your outstretched hands on the bars and mark the natural position, accounting for a bit of excess bar end length for protection from trail obstacles. Remember…measure twice (or thrice) and cut once. If you have carbon bars, do not cut them without a proper carbon blade. It’s best to ask your local bike shop to help you fit your bars to you. Most will do this free with a new bike purchase.
First ride. Now that you have your bike approximately fitted to you, it’s time to ride. On your first journey out, I’d recommend that you stick to a dirt road or field close to home so that you aren’t putting pressure on yourself to accomplish any set distance or trail. Straddle your bike across the top tube (the bar from the saddle to the bars). Decide which is your natural dominant foot and put that pedal forward and at an about 45-degree angle upwards from flat. Squeeze your brakes and step up on the pedal and back down. Feel how this step-up allows you to access the saddle from its higher position. Do this several times until you feel comfortable. Now release the brake as you step up next time and this will propel the bike forward while lifting you up enough to sit on the saddle. You got it!
To stop, reverse the process, but this time have the dominant foot’s pedal all the way down to the 6-o’clock position. Squeeze the brakes, stand up off the saddle and lean away from the side your lower pedal is on. Take the other foot off the pedal and step off, leaving your dominant pedal foot planted on the pedal. Now you have a sturdy tripod supporting you and your bike: wheel, foot, wheel. When you are ready to go again, move your dominant pedal around backwards to the same Front side 45-degree position, step on it and go! Practice mounting, starting, stopping and dismounting until you feel confident and comfortable. Practice pedaling at a medium speed and then try going as slowly as possible and still stay upright. If you have good balance skills, you can learn to balance steady and still on your bike, standing with flat (3-o’clock and 9-o’clock) pedals in what is called a track stand, a great skill to master and one I just can’t quite do!
Coasting. Once you have pedaled down, the next step is to practice coasting. Get moving at a good speed in a straight line and then stop pedaling and stand up on your pedals, off the seat with your knees bent, one foot forward at 3-o’clock and one back and 9-o’clock. Angle both feet slightly back so there is slight forward pressure keeping your feet planted on the pedals. (Watch some You Tube videos of riders going down trails to get a good mental picture of what this should look like). Try to stay upright as long as possible before needing to pedal again. Practice this with both feet forward alternately to develop good balance and to allow both Achilles tendons to alternately stretch and rest. This skill is necessary for you to lower your body position going downhill and to take pressure off both your hands and feet and your sit bones.
Trail prep. OK, you have mounting, dismounting and pedaling down solid, so it’s time to take on some common trail obstacles. First, make yourself a path about 4-inches wide. You can kick out a path through the pine needles or rake a short path in the dirt. Make it a straight path at first and then add a turn or two. Practice looking 10 to 20-feet ahead of your front wheel and not just down at the trail directly in front of you. Find a couple of trees and practice riding figure eights around them. Then add a tree or two to practice winding around trees, making sure to do both left and right-hand turns. Make sure you leave plenty of room for yourself so that you can turn without cramping yourself.
When you feel confident, find some clean 2x4’s or small logs and lay them across your path. If you feel fearful of going over them, walk your bike across them and watch how easily the bike handles these small obstacles. Then it’s time to ride over them. Make sure you have plenty of forward momentum and let the bike roll right over the sticks. After you feel comfortable rolling over these sticks, it’s time to build on your skills by combining rolling over the sticks with standing up and coasting over them. Let your arms absorb the bump as the front tire crosses and let your knees absorb it as the rear wheel rolls over. You can now double the sticks up or get bigger ones and build your confidence so that when you see rocks and roots on a trail, you will glide right across them.
Next, you can lay the sticks next to one side of your “trail” and practice ratchet pedaling so that your pedal on that side doesn’t hit the obstacle. Ratchet pedaling is when you use just one pedal to go forward. Pedal until you reach the 3-o’clock position and then back pedal to 12-o’clock, repeat. What this will do is enable you to keep going forward when there is a rock or other obstacle along the side of a trail. Practice this on both sides. Lastly, it’s time to work on shifting.
You always try to shoulder shift your bike when your feet are in the 12-o’clock and 6-o’clock positions because that is when you deliver the least amount of power on a pedal stroke and it makes it easier for the derailleur to move across the cassette. I usually pause, pedaling for just a moment as I shift. Try to get where you can shift both up and down nearly silently. Don’t hold back on shifting. When I started out, I felt I should only shift when climbing a steep hill and made myself work much harder than necessary. Shift up or down to keep your pedaling as comfortable as possible and don’t worry about which gear you are in. As you get stronger, you’ll probably use slightly higher gears, but it’s better to pedal at a higher cadence (rate the pedals go around) than at a lower one stressing your equipment.
Go! You’ve been practicing mounting and dismounting, steering, pedaling, ratcheting, coasting, going over small obstacles and shifting, so now it’s time to hit a real trail with confidence! First, find out what trails in your area are considered “green” trails. Find one that is 3 to 5-miles in a loop or plan to do that distance as an out-and-back. Don’t plan on anything much longer than this the first few times out. Take water and some snacks and a friend with you and plan on being out for at least an hour. Lube your chain, check your tire pressure, and, if you are going alone, let someone else know where you are going and how long you expect to be out (make sure you let them know when you get back lol). Start off nice and slow and remember to watch the trail in front of you and not directly down at the ground.
Having a more experienced rider in front of you will give you a “line” to follow around trail features. Don’t get in a hurry and allow yourself to stop when you see something that looks “crazy”. Walk your bike over this feature a couple of times and watch how close the obstacle is getting to the bottom bracket. Chances are, it’s not even close. Now back off 20 or 30 feet to get a good start on this obstacle and build up speed. Bend your arms to absorb the front wheel impact and go right over this thing. You got this!
When you get to an uphill section of trail, remember to shift down and keep on pedaling. It helps to lower your body position over the bars and use your arms and core to create as much power as you can. Look forward to the top and keep on pedaling till you get there. If you run out of gas or hit an obstacle that stops you, brake and dismount. If you can’t get going again immediately, walk to a flatter section to restart. Often, a short walking break will give you enough power to finish the climb. At the top, allow yourself a congratulatory pat on the back, a sip of water and a little snack. Look around and enjoy the view, breathe deep, get your heart rate back down and most of all feel glad to be alive and outdoors on this beautiful day. Reward yourself for your accomplishment before continuing on.
When headed downhill, lower your dropper post if you have one, stand up on the pedals and crouch down as low and as far back as your seat will let you. Let your legs absorb the terrain and feather your brakes gently to keep your speed comfortable. Try not to let your tires come to a stop and skid because as soon as your wheels stop turning, you begin to lose control. Make sure to never use only your front brake when going downhill or you’ll end up face first in the dirt-don’t want that! Do use both brakes, though, and keep your front wheel under control to guide you down. When you reach the bottom, breathe and take another reward and snack break (yes, I like snack breaks lol). Remember, if you are not comfortable, walking it can show you what your bike is capable of and will give you confidence to go back up and try it again today or another day. Failure is not an end all, it’s usually just the beginning of success.
One day at a time, one skill at a time, one mile at a time will soon take you from beginner crazy (that 2x4 is scary) to intermediate crazy (let’s climb this hill and come down the other side) and beyond. Once you get confident that you can do that green 5-mile loop, try a blue one at 8 to 10 miles. Once you’ve accomplished that and didn’t die, you are ready to join a group ride! Now you are going to have some fun. Most group rides are limited to green and blue trails and will have a “drag” rider at the back who will give you tips, make sure you don’t get lost and will definitely not mind getting you through the ride at a slower pace.
Most rides are “no drops” which means that you will not get left behind no matter what. Riding with a group inspires confidence, gives you motivation to ride farther and faster than you might alone, provides you a safety buffer in case of accident or bike failure and lets you build a whole new group of amazing people you can spend time with and enjoy. Here’s to a great new addition to your lifestyle and one that will keep you young longer and in much better shape than you ever thought possible. Keep on pedaling!